Showing posts with label Scary Silhouette Dies. Show all posts

Tuesday, September 16, 2025

Scary Cute Trick or Treaters

 Hello & Happy Tuesday, Friends!

Today I have a few things at my stamp table to work on then I'm headed to Audrey's this evening to drop off her card order. We are coming into the busy time of year with 3 holidays right in a row plus lots of treats, too! I am still working on Halloween candies and will share them soon!

Today I have cards to show you that I made for 3 of Audrey's 5 great grandchildren. The 3 older ones will be trick or treating this year so I decided to pull out a retired set called Scary Cute. I semi cased a card I seen on Facebook which I have no idea who created it. I was taken with all the little colorful circles then decided to add my little trick or treaters to the mix of circles...


Card Details:

Stamps: Scary Cute (retired), Potions & Spells (retired- sentiment)
Ink: Memento Black, Gorgeous Grape
Cardstock: Basic Black, Pumpkin Pie, Gorgeous Grape, Lemon Lime Twist, Basic White
Accessories: Stylish Shapes Dies, Scary Silhouette Dies (retired), Circle Layering Framelits (retired), Gorgeous Grape Glossy Dots (retired), Black & White Ribbon (retired), Glue Dots, Tombow Multipurpose Liquid Glue

I love how these turned out and hope Audrey will love them, too!

**************************
My thoughts today...


Thanks for stopping by!
~Wendy


Monday, October 31, 2022

Happy Halloween, Everyone!

 Good Morning & Happy Monday!

I hope you all had a great & relaxing weekend!

Can you believe today is Halloween already??
I feel like the last several months have passed me by since I was sick.
I have 2 more Halloween treats to share with you that I made back in August when the Halloween candy finally hit the shelves...


I have found that the Reese's Peanut Butter Pumpkins are a great seller and everyone loves them! For these I placed 2 of the small pumpkins in a Cello Bag and created my topper. I made 6 of these and sold 4. The last 2 are going to Shawn & Ryan for Halloween!

Project Details:

Stamps: Little Delights (retired)
Ink: Basic Black Archival (retired), Pumpkin Pie
Cardstock: Gorgeous Grape, Basic White, Celebrate Everything DSP
Accessories: Stylish Shapes Dies, Frightful Tags Dies (retired), Gorgeous Grape Glittered Enamel Dots (retired), Cello Bags, Stapler, Dimensionals, Tombow Multipurpose Liquid Glue

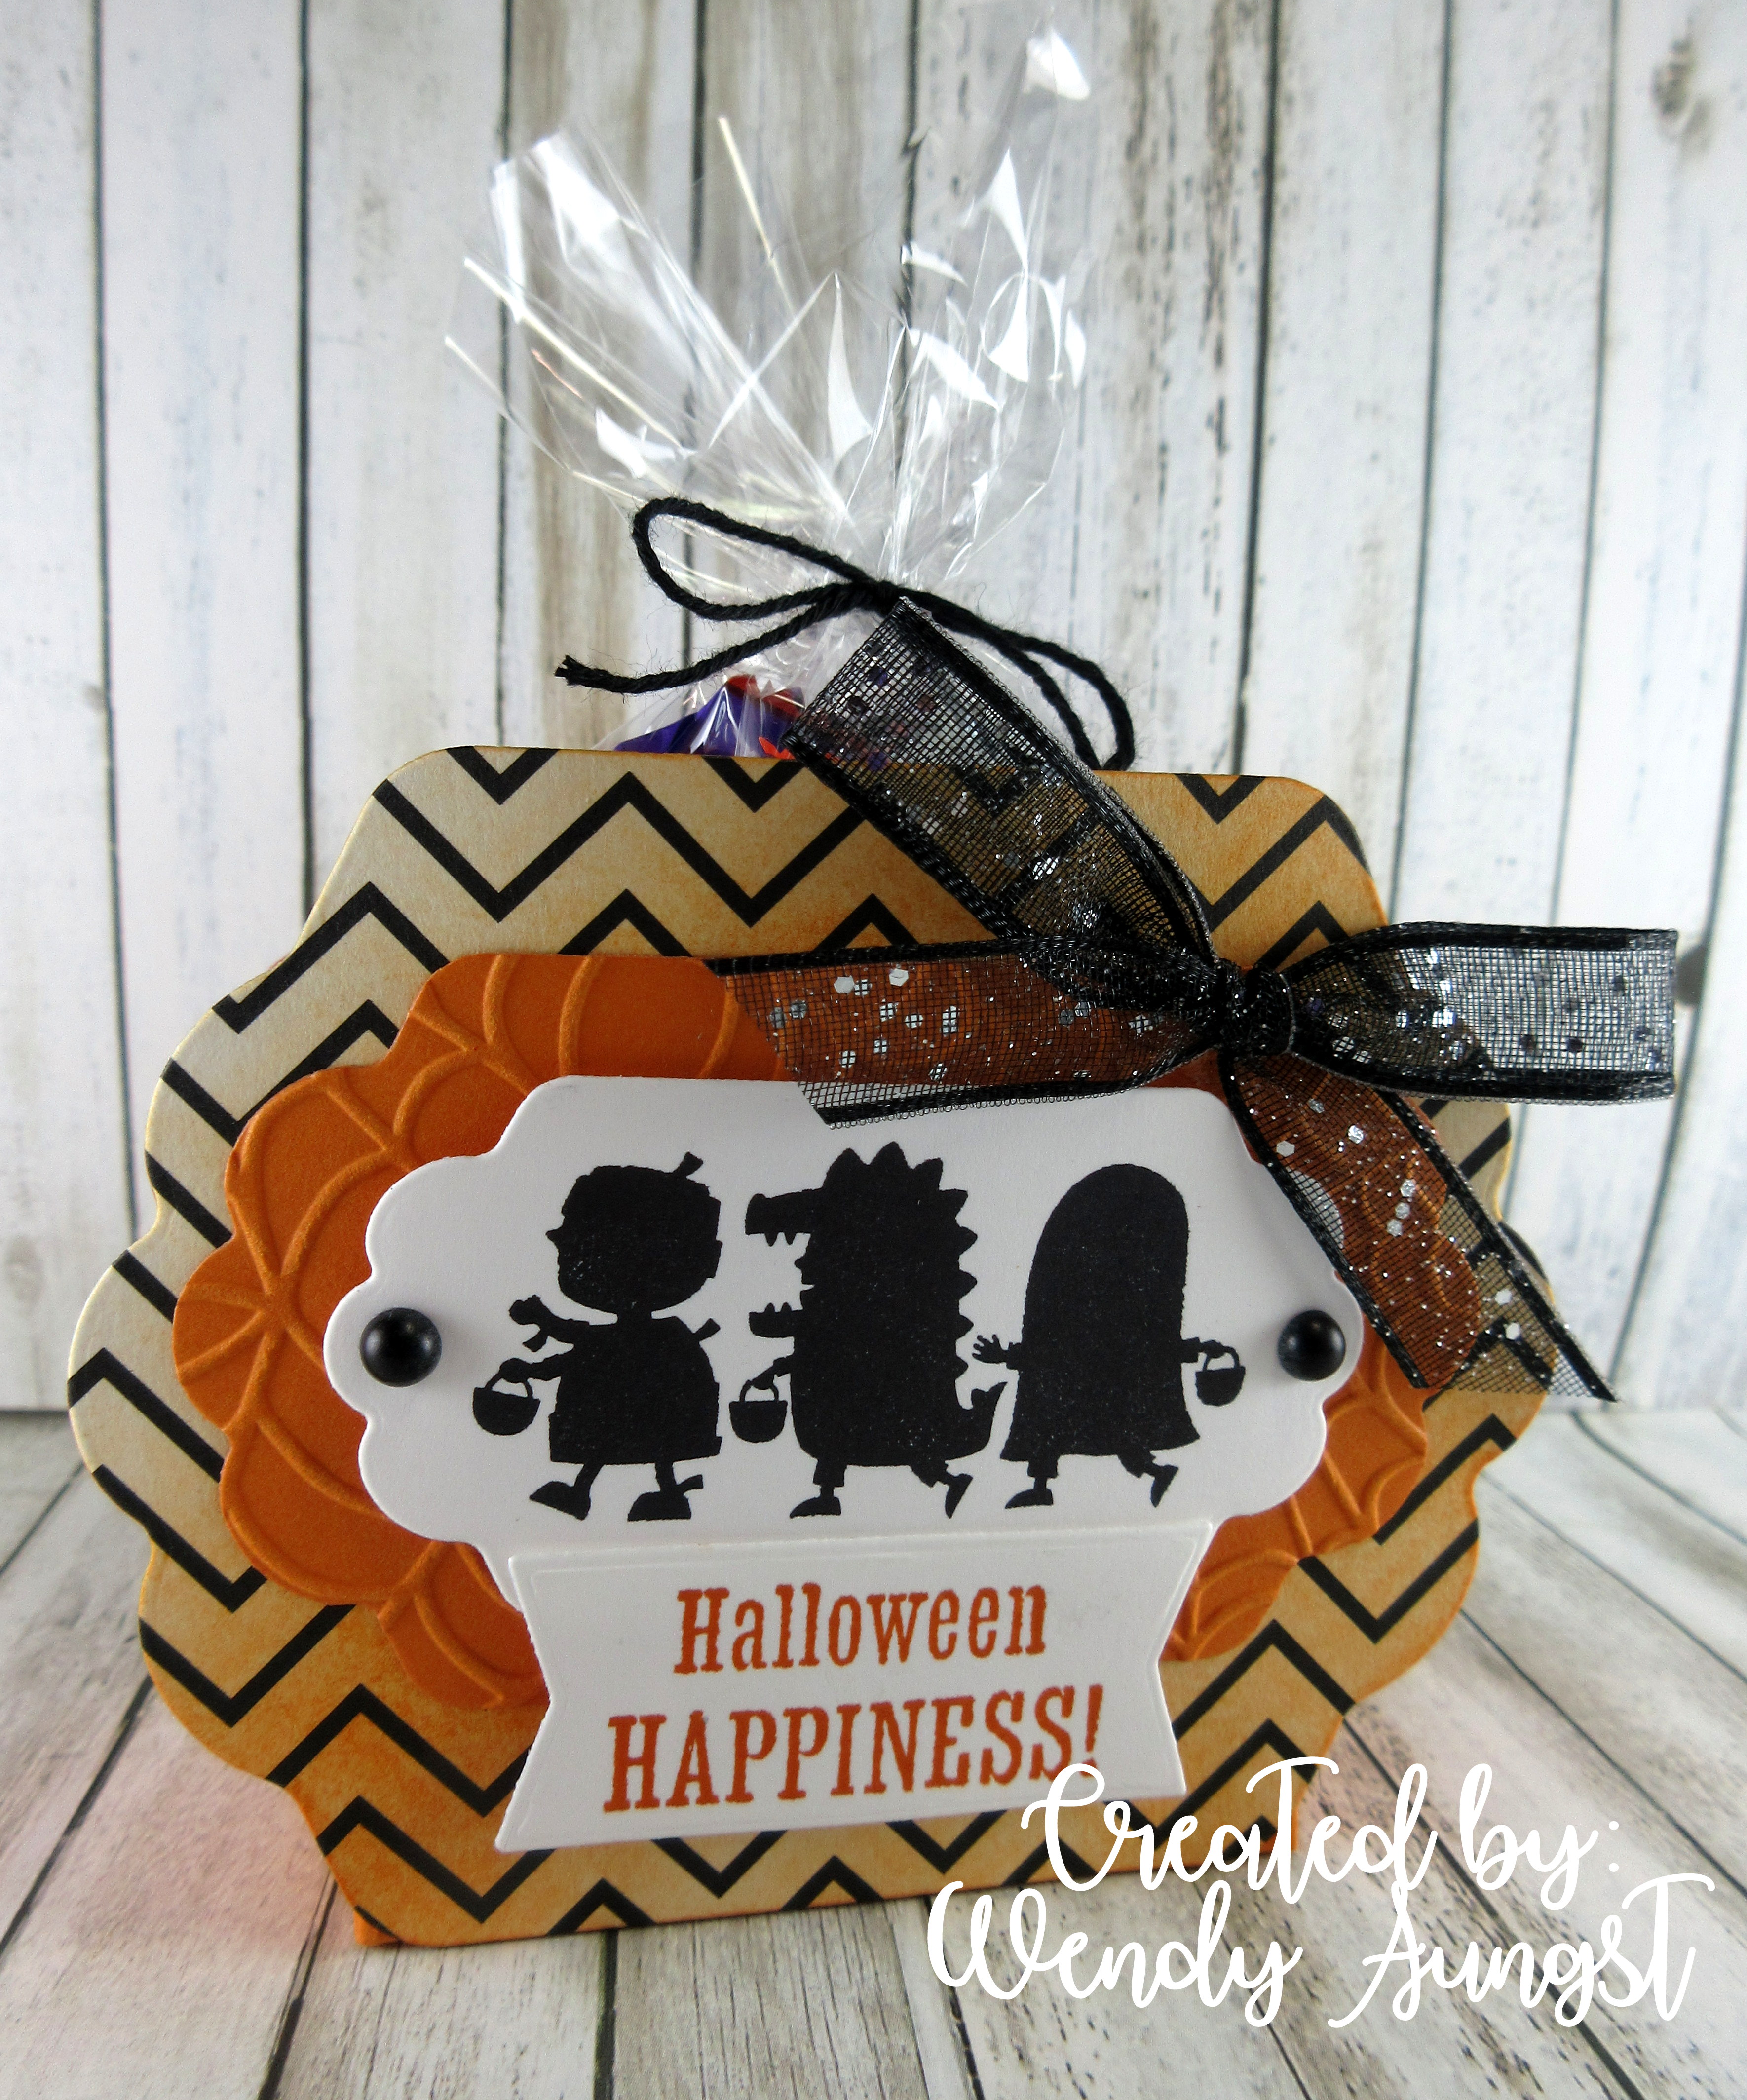
Next is a cute box that I created using the Seasonal Layers Dies!


For these I diecut the front & back of the box using the Black & White DSP and then I added some Pumpkin Pie ink using a Blending Brush. I thought they turned out adorable!
My trick or treaters were stamped using the Stamparatus using Basic Black Archival ink.
The pumpkin Pie layer under the trick or treaters was embossed with the Cobwebs 3D EF that is retired. The cello bag inside the box has a mix of candy in it! Reese's PB Pumpkin. Hershey's Cookies & Cream Bar, Witch's Brew Kit Kat and a York Peppermint Patty!
I made 5 of these boxes and sold 4. The last one went to Kelsey!

Project Details:

Stamps: Scary Cute
Ink: Pumpkin Pie, Basic Black Archival (retired)
Cardstock: Pumpkin Pie, Basic White, Black & White DSP
Accessories: Seasonal Layers Dies, Scary Silhouettes Dies, Cobwebs 3D EF (retired), Stamparatus, Black Glittered Ribbon (retired), Black Twine, Black Matte Dots, Cello Bags, Blending Brushes, Glue Dots, Dimensionals, Tombow Multipurpose Liquid Glue

And that is a wrap for this Halloween 2022!
I hope if your out trick or treating this evening that you stay safe and have fun!

***************************************
My thoughts today...


Thanks for stopping by & Happy BOO from me to you!
~Wendy


Saturday, October 22, 2022

Scary Cute Fun Fold

 Good Morning & Happy Saturday!

Today I have a cute Halloween card to share that the girls made last Saturday at my Stamp Day w/ Friends get together. It uses the Scary Cute stamp set with the coordinating Scary Silhouette Dies. The card measures 4 1/4 x 11 scored at 1 1/2 and 5 1/2. The little flap on the front of the card is folded towards the front of the card and adhered down so our focal piece lays flat.


Card Details:

Stamps: Scary Cute
Ink: Basic Black Archival (retired)
Cardstock: Basic Black, Crushed Curry, Basic White, Celebrate Everything DSP (hostess)
Accessories: Stylish Shapes Dies, Circle Layering Framelits, Scary Silhouette Dies, Celebrating Tags Dies, Black Glittered Ribbon (retired) Glue Dots, Black Matte Dots, Stamparatus, Dimensionals, Tombow Multipurpose Liquid Glue

We used the Stamparatus to get a good deep impression for our little trick or treaters.
We inked it up 3 times and stamped to get the perfect image!
The girls loved this one however when I put my card together I realized I did not cut some of my pieces to the right measurement. I had to go cut a few new pieces to the right size once we finished up. I guess when I was sick I was really off my game.
I am feeling much better but I do still have that cough, just not as bad.
I see my doctor on Monday so we will see what she suggests. I am still using the inhaler for a few more days. I think I may need to be on it longer.

*****************************************
My thoughts today...


Thanks for stopping by & have a spooky fun day!
~Wendy


Monday, October 17, 2022

Trick or Treat, Your SO Sweet

 Good Morning & Happy Monday!

I hope you had a fabulous weekend!
We had some lovely Fall weather here and Saturday I had my Stamp Day w/ Friends!
It's been a long 2 months since I last seen them so it was nice to catch up!
I will share our projects as soon as I get pictures of them.

Today I wanted to share with you the Hershey Bar Wrappers I made for Halloween.
I haven't made them for Halloween in awhile and I felt the Scary Cute Bundle was perfect for the design. I made 6 and sold 5 so I am happy about that!


I stamped my little Trick or Treaters on Parakeet Party cardstock using Basic Black Archival ink that Stampin Up! had out a few years ago. This ink is much deeper and stamps better than the Memento Black. Although the Basic Black Archival ink is retired I find myself using it every year for Halloween cards for the deeper and more black images. I used my Stamparatus for this to make sure I got the perfect images. Worked like a charm!

I have been making this Hershey Bar Wrappers for many years.
 I got the directions off Splitcoaststampers back in the early 2000's when I first got into stamping and have always made them for the Christmas Craft Shows. 
They sold like hot cakes!

Project Details:

Stamps: Scary Cute
Ink: Basic Black Archival, Gorgeous Grape
Cardstock: Parakeet Party, Basic Black, Basic White, Black & White Designs DSP
Accessories: Scary Silhouettes Dies, 1 1/2 in Circle Punch (notch on the top of wrapper-retired), White Glittered Ribbon, Paper Crimper (retired), Dimensionals, Tombow Multipurpose Liquid Glue

If your interested in making your own Candy Bar Wrappers, below are the directions. 
I found the Halloween Hershey Bars at my local grocery store (Giant) back at the end of August so I'm not sure if they are still available but you can always use just the regular Hershey Bars as well. 

Directions for the Candy Bar Wrappers:

Cut cardstock at 6 3/4 X 6.
With the 6" side facing you on the paper cutter you want to score at 2 3/4 and again at 5 1/2.
Take your bone folder and give the scores a nice crease. Glue the bottom & side with a heavy duty adhesive. Take a paper crimper and crimp the bottom that you glued. That also helps to keep it glued together. The top of the candy bar wrapper you want to use a 1 1/2" Circle Punch. Punch only a half moon circle which is half way down, do not punch the whole circle, just half. Then decorate and have fun!
These make a cute little gift at anytime of the year!


They are so much fun and who doesn't love a Hershey's Chocolate Bar!

************************************
My thoughts today...


That is scary! I thought this morning that my Keurig broke because it wasn't brewing my coffee. Here I must have been still sleeping when I hit the button and it just sat there. I never closed the lid on the K-Cup! LOL
I am off to get my day started and to start picking at a puzzle!
Thanks for stopping by & have a wonderful start to your week!
~Wendy