Thursday, September 30, 2021

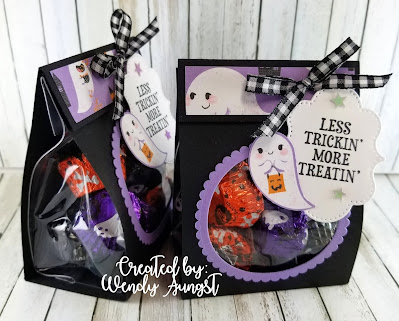
Ghost Candy Totes

Hello & Happy Thursday!

Can you believe that today is the last day of September already?!
This year is flying by so quickly!

We are 1 day away from the weekend but it's going to be a busy one here!
Saturday is World Card Making Day!
I am having my friends over in the afternoon to make some Halloween cards!
My doggies have doggie day spa in the morning so that is why I am doing it later.
It's going to be fun!

Today I am sharing another Halloween candy treat!
I make these totes quite a bit since I have so many of the 3 x 6 Gusseted Cello Bags that Stampin Up! has retired. I learned to make these from a Stampin Up demo that I do not think is a demo anymore, sadly! She was amazing!


I used Reese's Peanut Butter Miniatures in my cello bags.
The Halloween wrappers are in orange, purple & black, perfect for Halloween!
I filled my cello bags with 9 candies.
I started with a piece of Basic Black cardstock measuring 3 x 11 that were scored at 4, 6 & 10.
Crease those score lines nice so it helps the tote to stand better.
I used a Circle Layering Framelit to cut out my window in the front of the tote.
Then I made the frame with Highland Heather with a scalloped Circle Layering Framelits and glued that on.
I put a piece of Cute Halloween DSP on the flap.
I used 2 Dimensionals to hold my flap shut by putting them under my sentiment panel. I diecut the sentiment panel with the Frightful Tags Dies.
The little ghost is punched out of the Cute Halloween DSP using the Halloween Punch. I love the little ghost! 
Lastly, I added some adhesive Stars and a bow using the Black & White Gingham Ribbon! I have gone thru 4 rolls of this ribbon! LOVE IT! I hope Stampin Up! will carry it long after this mini catalog is done.

Halloween Totes:

Stamps: Frightfully Cute
Ink: Basic Black Archival (retired)
Cardstock: Basic Black, Basic White, Cute Halloween DSP
Accessories: Circle Layering Framelits, Frightful Tags Dies, Halloween Punch, 3 x 6 Gusseted Cello Bags (retired), Adhesive Stars, Dimensionals, Tombow Multipurpose Liquid Glue

I whipped up 8 of these in no time and used 2 1/2 bags of candy.
These are definitely a favorite for my customers!

***************************************
 My thoughts today...


Thanks for stopping by & have a terrific day!
~Wendy


Wednesday, September 29, 2021

2021 Halloween M&M Sticks

 Hello & Happy Wednesday!

Today I have a quick post for you!
I'm sharing my 2021 Halloween M&M Sticks that I make every year and for almost every holiday!
I'm so glad that M&M has brought back their Halloween colored ones...they are so colorful & pretty!


I had an order for 20 of these which took care of my 1x8 cello bags!
I have none left. I will look online to see if I can find more.

Halloween M&M Sticks:

Stamps: Frightfully Cute
Ink: Gorgeous Grape, Granny Apple Green
Cardstock: Basic White
Accessories: Frightful Tags Dies, 1x8 Cello Bags, Twine from Hobby Lobby, Dimensionals

I love making these!

*******************************************
My thoughts today...


Thanks for stopping by & have an awesome day!
~Wendy


Tuesday, September 28, 2021

Halloween Notebooks Part 2

 Hello & Happy Tuesday!

We had another beautiful day yesterday!
Shawn had taken a comp day since he has been working lots of long hours and his lead guy came back from FMLA. We did a few errands and stopped at Hobby Lobby since I have been in need of Glue Dots! I love browsing the stores at this time of year looking at all the Fall/Thanksgiving stuff....even Christmas! I bought Kelsey a Hot Cocoa sign for Christmas that she had been wanting and I picked up a Gingerbread garland and some ornaments for the Christmas Tree!
I know i'm jumping the gun but those stores will be very busy once Halloween is over and I did not want to take a chance and not be able to find them.
Oh, and I did get some Glue Dots so I went home a happy woman! 

Today I have the rest of the Halloween Notebooks to share with you!
These are such fun!


These little composition notebooks I picked up at Walmart over the summer and decorated them using the Cute Halloween DSP!
This package of paper has some of the cutest prints in it that I think Stampin Up! has ever had! I hope they keep this up!
I used the Frightfully Cute & Frightful Tags Dies as well as the Cute Halloween and Halloween Punch bundles on these! Both stamp sets go well with one another and that makes it worth purchasing both!
The last one I colored my Black & White Gingham Ribbon with my Highland Heather Stampin Blends! Such a great touch!

Halloween Notebooks:

Stamps: Frightfully Cute, Cute Halloween
Ink: Pumpkin Pie, Basic Black Archival (retired), Highland Heather, Highland Heather Stampin Blends
Cardstock: Basic White, Basic Black, Highland Heather, Cute Halloween DSP
Accessories: Circle Layering Framelits, Frightful Tags Dies, Halloween Punch, Black & White Gingham Ribbon, Adhesive Stars, Dimensionals, Tombow Multipurpose Liquid Glue

The little pens I have had for a few years. They came from Walmart.
 I did pick up a pack of them at Dollar Tree this year but haven't opened them yet.  I will keep them for next year!

**************************************
My thoughts today...


Thanks for stopping by & enjoy your day!
~Wendy


Monday, September 27, 2021

Halloween Candy Pouch

 Hello & Happy Monday!
 
I hope you had a wonderful weekend!
They go by so quickly!
It has felt like Fall arrived here with some pretty cool nights!
I love this time of year!

Today I have another candy treat to share that I made for Halloween!
I used the Hershey's Miniature Candy Bars for these.


Here are the directions...

Basic Black cardstock measuring 2 1/2 x 6 1/2.
Scoring on the 6 1/2 side at 4 1/8 & 4 1/4.
DSP for inside measuring 2 1/4 x 3 7/8.
DSP for front panel measuring 1 3/4 x 2 1/4.
I put a piece of 2 Sided Tape on the back of my cello bag to help hold it in place.  
I used a 3/4 inch Circle Punch to create notch at the top of the treat holder and I ran my ribbon completely around the holder to also help hold the cello bag in. 
I used a 3 x 5 cello bag and it was too big.
I taped bag on the bag to hold my 4 Hershey's Miniature's Candy Bars snug in the bag. I did not have anything smaller that would work.
Lastly, decorate & have fun!

Halloween Project:

Stamps: Frightfully Cute, Sparkle of the Season (sentiment)
Ink: Basic Black Archival, Basic Gray
Cardstock: Basic Black, Old Olive, Black Glitter Paper, Basic White, Cute Halloween DSP
Accessories: 3/4 Circle Punch, Frightful Tags Dies, Circle Layering Framelits, Black & White Gingham Ribbon, Iridescent Black Pearls (retired), Dimensionals, Tombow Multipurpose Liquid Glue

************************************************
My thoughts today...


Thanks for stopping by & have a great day!
~Wendy


Sunday, September 26, 2021

Halloween Nonpareils

 Hello & Happy Sunday Afternoon!

Hope your having a nice relaxing weekend!
It's been anything but here but we did get to relax this afternoon watching the football game! Phew, that one was a nail biter for sure! Shawn had to get up and walk away as he could not watch the last minute! 
Our team won though so it was all good!

I said in my last post that I got a new camera but sadly it does not come with the cord that you use to upload your pictures onto your computer. It's going back to the store tomorrow! Not sure what I am gonna do but for now I will use my phone.

I have another sweet treat to share today now that I was able to take more pictures with my phone. 


Last week I found the Halloween Nonpareils at my local grocery store and thought, how cool would they be decorated for Halloween?! 
Something different for sure and I bought 2 small containers!
I filled my 3x5 Cello Bags with about 16 candies and then created a topper for them. I tried to keep them simple! LOL

My topper is made from Pumpkin Pie cardstock measuring 3 1/4 x 4 and scored at 2 inches. I added some of that pretty Plaid Tidings DSP from last year. I have one piece of this DSP left which makes me sad....it's so pretty in these colors (and matched my nonpareils perfectly!)!
Then I stapled my topper onto my cello bags and looked for some stamps to decorate them!
I pulled out my Frightful Tags Dies and got to work.
Once I diecut the main panel I stamped it with a pumpkin from the Banner Year stamp set. I love this set! My pumpkin was stamped in Pumpkin Pie ink then I used Soft Suede to stamp the stem & leaf. 
Next I used my Stamparatus to stamp my saying from the Frightfully Cute stamp set. I have a bunch of those labels diecut ahead of time and I have a template ready to use it in my Stamparatus to make it quick & easy! I attached my pumpkin panel with Multipurpose Liquid Glue then took my sentiment and popped it up with Mini Dimensionals. Of course, once they were done I had to add a Champagne Rhinestone to each and a Daffodil Delight bow made with various retired ribbons!

I just love these....and the candies!

Halloween Project:

Stamps: Banner Year, Frightfully Cute
Ink: Pumpkin Pie, Soft Suede
Cardstock: Pumpkin Pie, Basic White, Plaid Tidings DSP (retired)
Accessories: Frightful Tags Dies, Stamparatus, Champagne Rhinestones, Glue Dots, Mini Dimensionals, Tombow Multipurpose Liquid Glue

Hope you like these!
I'll be back tomorrow with another fun treat so stay tuned!

*****************************************
My thoughts today...


Thanks for stopping by & have a great day!
~Wendy


Thursday, September 23, 2021

Halloween Notebooks

 Hello & Happy Thursday!

Today I have something to share that isn't a sweet treat but still made for Halloween.
My one friend always likes the notebooks done up for different holidays so over the summer I picked up a pack of small composition notebooks at Walmart and turned them into little Halloween Notebooks. 
I even had a bunch of small pens to put with them!


These were decorated with the Cute Halloween DSP which I just love this year!
I purchased 2 packages of it and I still have a good bit left.

Halloween Notebooks:

Stamps: Cute Halloween, Frightfully Cute
Ink: Pumpkin Pie, Basic Black Archival, Stampin Blends- Highland Heather & Pumpkin Pie
Cardstock: Pumpkin Pie, Basic Black, Highland Heather, Basic White, Cute Halloween DSP
Accessories: Circle Layering Framelits, Halloween Punch, Banner Punch (retired), Tasteful Textile 3D EF, Black & White Gingham Ribbon, Black Matte Dots, Stars, Dimensionals, Tombow Multipurpose Liquid Glue

I used Stampin Blends to color my Black & White Gingham Ribbon!
Love how it turned out!

I have 2 more to share with you on another day.
I picked up a new camera last evening....I just need to learn how to use it!
I only had these 2 pictures taken before my camera started acting wonky so once I learn the new camera I will take pics of the last 2!
They are so much fun to decorate! 
I did a bunch up for Christmas as well!

****************************************
My thoughts today...


It's to be a soaker to start the day and then end with some nice sunshine.
Our temps are going to drop and certainly make it feel like Fall tomorrow!
Our leaves have not started to change colors just yet. Hopefully in the next few weeks that will happen. I'm just thrilled to see straight 70's across the board for all of next week! 
Happy Fall Y'all!!!

Thanks for stopping by & have a wonderful day!
~Wendy


Wednesday, September 22, 2021

Mummy Kit Kat Holders

 Hello & Happy Wednesday!

A rainy day is on tap for our 1st day of Fall!
The last few days have been so nice!
Temps in the 70's, blue skies & no humidity, definitely my kind of weather!
The best part is not having to run my AC!!!

So, today I have another Halloween Treat to share with you!


I took Basic Gray cardstock measuring 2 1/4 x 5 1/2.
Scoring on the long side at 3 1/2 & 4.
This just creates a little pouch to put the candy in. 
Next I cut a piece of retired Halloween Night DSP to create a belly band to wrap around the pouch to keep the candy from falling out of the sides. 
This piece measures 1 1/4 x 6.
I wrapped it around my holder with the candy in so I could secure the belly band tightly in the back.
Then I took another piece of the same DSP measuring 2 x 3 1/4 to put on the inside of where the candy is. 
Then decorate!

Halloween Project:

Stamps: Cookie Cutter Halloween (retired), Spooky Cat (retired sentiment)
Ink: Basic Black Archival, Basic Gray
Cardstock: Basic Gray, Smoky Slate, Basic White, Halloween Night DSP (retired)
Accessories: Cookie Cutter Builder Punch, Classic Label Punch, Hand Held Hole Punch (for the ribbon/bow), White & Black Glittered Ribbon, Rhinestones, Dimensionals, Tombow Multipurpose Liquid Glue

I made 12 of these, 6 with the White Glittered Ribbon & 6 with the Black Glittered Ribbon. It's always fun to pull out the old stuff and put it to good use!

I'll apologize for these not so great pictures. 
I am still using my phone.
Haven't gotten out yet to look for a new camera but I hope to soon!
If you try these and have any questions please shoot me an email, ok?

**************************************
My thoughts today...


Thanks for stopping by & have a wonderful day!
~Wendy


Tuesday, September 21, 2021

Halloween Bags

 Hello & Happy Tuesday!

Today's Halloween Project is made with mostly retired items.
I have been trying for the last few years to clean out what I have in drawers and get it used up. I found a package of glassine bags that I believe were from a Halloween Kit from years ago and had enough to make 8 of these up with lots of yummy Halloween candies!


I made a topped to put over the top of my bag and stapled it on.
My paper is from the Cute Halloween DSP.
My tag is from the retired Sweet Hauntings stamp set & Tag Punch and I added a Black & White Gingham bow to my tag!
And my adorable little ghost is punched out of the Cute Halloween DSP using the Halloween Punch.

Treat Details:

Stamps: Sweet Hauntings (retired)
Ink: Pumpkin Pie
Cardstock: Highland Heather, Pumpkin Pie, Whisper White, Cute Halloween DSP
Accessories: Tag Punch, Halloween Punch, Black & White Gingham Ribbon, Gorgeous Grape Glittered Enamel Dots (retired), Dimensionals, Tombow Multipurpose Liquid Glue

My glassine bags hold 1 Bite Size Reese's PB Pumpkins, 1 Bite Size Milky Way, 1 Bite Size Snickers, and a Bite Size Twix. 
Definitely a yummy treat for a sweet Trick or Treater!

**************************************************
My thoughts today...


Thanks for stopping by & enjoy your day!
~Wendy


Monday, September 20, 2021

Tombstone Boxes

 Hello & Happy Monday!

Halloween has arrived here on my blog!
I'm so excited to share my treats with you over the next couple of days.
Today I am starting out with the Stampin Up! Tombstone Boxes!


First off I have to say that these pictures aren't all the best as I had to take them with my phone. My camera port where it gets plugged into the laptop broke!
I will be out shopping later this week for a new camera because I am not keen on using my phone!

These boxes are pretty cool and they hold a lot of candy inside.
I wasn't sure I was going to like them but once I got them decorated and filled, I loved them! I seen many people cut a window out on them but I decided not too and just decorate with DSP. I have 3 bite size Reese's Peanut Butter Pumpkins, Ghost & Bats in these and I could probably get 1 more in there but did not want to push it.

Card Details:

Stamps: Cute Halloween
Ink: Highland Heather, Basic Gray
Cardstock: Basic White, Basic Gray, Basic Black, Cute Halloween DSP
Accessories: Circle Layering Framelits, Halloween Punch, Stitched Rectangle Framelits, Stitched Shapes Framelits (retired), Black & White Gingham Ribbon, Glue Dots, Cute Stars Sequins, Dimensionals, Tombow Multipurpose Liquid Glue


They come in a package of 8.
You do not need anything to put them together. 
2 Sided Tape is already on the boxes which make them go together quickly!
I think they are perfect for any trick or treater whether young or old!

**********************************************
My thoughts today...


Thanks for stopping by & enjoy your day!
I'll be back tomorrow with another treat so I hope you'll come back!

~Wendy


Sunday, September 19, 2021

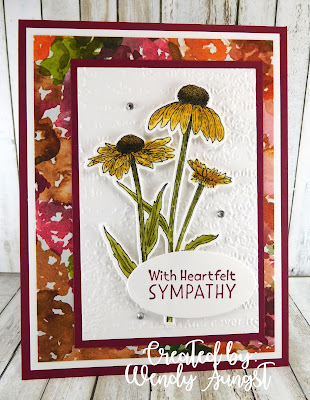
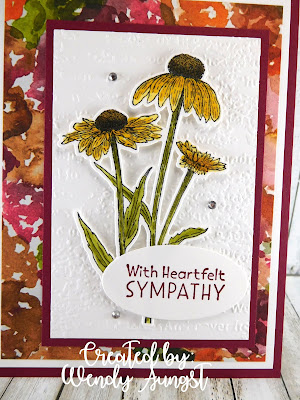
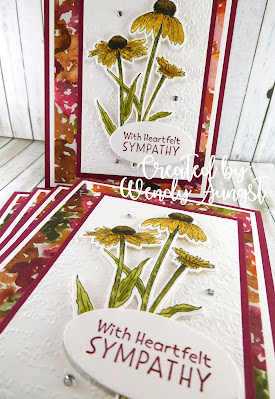
Nature's Harvest Sympathy Set

 Hello & Happy Sunday!

It's finally football Sunday for us!
I know the season started last week and our Ravens played Monday Night Football but it was on too late and of course us old people are in bed by 9pm!
The Ravens are playing today so i'm thrilled to be able to see the whole game even though i'm 95% sure they are going to lose to the Kansas City Chiefs.

Anyways, I have one last set of cards to share that I made for my card lady.
This set was kind of a case of a beautiful card I got from my friend, Vicki Burdick.
She makes amazing cards and I wanted to try my hand at casing her but obviously her coloring is the best around and mine doesn't even compare! Anyways, thank you, Vicki, for your beautiful card and the inspiration for this set!


Card Details:

Stamps: Nature's Harvest, Inspired Thoughts
Ink: Memento Black, Merry Merlot, Daffodil Delight & Old Olive Stampin Blends
Cardstock: Merry Merlot, Basic White, Beauty of the Earth DSP
Accessories: Harvest Dies, Timeworn Type 3D EF, Oval Layering Framelits, Rhinestones, Dimensionals, Tombow Multipurpose Liquid Glue

I love this set of cards!

************************************
My thoughts today...


YAY!!

Stay tuned tomorrow as I am going to start sharing my Halloween treats!
I'm so excited!

Thanks for stopping by & have an awesome day!
~Wendy


Saturday, September 18, 2021

Apples & Pears, OH MY!

 Hello & Happy Saturday!

Hope your weekend is off to a great start!

We are up bright & early this morning as my dear hubby has to head in to work.
His work has mandated the vaccines and so many have not gotten them that they are walking off the job and quitting. They must be vaccinated by Nov. 1st or lose their jobs. He will most likely lose 3 of his guys. The one even went to see his lawyer to see what could be done about it. He has a bunch of great hard working guys that have been there many years but will not comply with the mandate. So now Shawn is busting his butt to keep things moving but after a week....I can see how tired & worn out he is. It's just never ending!

So, today I have one last set of apple cards to share with you!


As I went on a scavenger hunt to look for apple paper I found this pack of Tutti Fruitti from a few years ago and thought this would make a nice set of cards. Not only does it have red & green apples but pears, too! Luckily, I had enough to create this set of cards and use a mix of the patterns to coordinate with the colors in my apple DSP!
I started with a Real Red cardbase then a layer of Basic White that I ran thru the Big Shot with the Timeworn Type 3D EF. It's my new favorite! LOL
Then I cut all my DSP 2x3 and staggered them on my Basic White panel. I love this look as I think it's pleasing to the eye!
I then diecut some tags with Basic White cardstock using the Tailor Made Tags Dies (another favorite!) and stamped my sentiment on them in Real Red ink. The saying comes from the Pansy Patch stamp set. Lastly, I added a pretty sheer Real Red bow to each tag and added some Red Rhinestones for a bit of sparkle. I do believe these were my favorites from all the apple cards! I was very fond of the Real Red bows!

Card Details:

Stamps: Pansy Patch
Ink: Real Red
Cardstock: Real Red, Basic White, Tutti Fruitti DSP (retired)
Accessories: Timeworn Type 3D EF, Tailor Made Tags Dies, Real Red Sheer Ribbon, Dimensionals, Tombow Multipurpose Liquid Glue


And of course, my card lady loved them as well!

************************************************
My thoughts today...


That is all for me today!
Thanks for taking time out of your day to visit!
Have a nice weekend!
~Wendy


Friday, September 17, 2021

Thank You Cards

 Hello & Happy Friday!

Today I have another set of apple cards to share!
My card lady is on a roll with apple cards since it is apple picking season around here. I pulled out a retired stamp set called Tart & Tangy and got to work.


First I went thru my papers and found scraps of this pretty paper from October Afternoon. I'm not sure when this was available but it was a long time ago.
I started with a Real Red cardbase then a layer of Very Vanilla that I ran thru the Big Shot with the Tasteful Textile 3D EF. Next I added a 1 x 5 piece of retired Old Olive DSP then my cute apple paper. I had enough to make this set of cards with a few pieces left. I tried to make it work with what I had left. 
Then I stamped my apple image using Real Red & Old Olive Stampin Write Markers. They were diecut with Very Vanilla Circle Layering Framelits then matted with an Old Olive Scalloped Circle. My sentiment was stamped in Early Espresso and diecut with the Seasonal Layers Dies. Lastly, I added 1 Red Rhinestone to each apple and popped up the sentiment panel.

Card Details:

Stamps: Pansy Patch (sentiment), Tart & Tangy (retired)
Ink: Early Espresso, Real Red & Old Olive Stampin Write Markers
Cardstock: Real Red, Very Vanilla, Old Olive, Old Olive DSP (retired), October Afternoon Paper
Accessories: Tasteful Textile 3D EF, Circle Layering Framelits, Seasonal Layers Dies, Red Rhinestones, Mini Dimensionals, Tombow Multipurpose Liquid Glue

******************************************
My thoughts today...


Thanks for stopping by & enjoy your day!
~Wendy