Sunday, September 18, 2016

Kit Kat Candy Treats

Hello & Happy Sunday!

I been working on more fun treats for Halloween the last several days.
This project was leftover from last Halloween so I tore it apart and reused the main part.
It started out as this...


And after I tore them apart, I turned them into this....


My Basic Black cardstock strip is cut at 2 X 11 and then scored at 5 then again at 6. I placed both ends in the Scalloped Tag Topper Punch to get the fancy top and hole to tie the Halloween Night Baker's Twine thru. The baker's twine is what holds it together. Inside I placed a 2 X 8 sized cello bag which I cut down to fit inside the 2 flaps. I used 2 Sided Tape on one side of the bag to hold it in place. I used the Halloween Night Specialty DSP on both sides of the candy holder. I used Spooky Fun for the adorable row of pumpkins & sentiment and at the bottom on the holder I added just a very tin strip of Pumpkin Pie Glimmer paper just for a pop of sparkle! I'm pretty pleased with these and will more than likely make more. I used Kit Kats inside my cello bags and they fit perfectly!


Kit Kat Candy Treat Holders:

Stamps: Spooky Fun
Ink: Pumpkin Pie, Basic Black Archival
Cardstock: Basic Black, Pumpkin Pie, Whisper White, Halloween Night Specialty DSP, Pumpkin Pie Glimmer Paper
Accessories: Halloween Scenes Framelits, Circle & Scallop Circle Punches, Scalloped Tag Topper Punch, Halloween Night Baker's Twine, Dimensionals, Tombow Multipurpose Liquid Glue

Another easy treat holder to whip up in no time! 

***************************************

My thoughts today.....


Haha! One can wish, right?

That's all for today!
Stay tuned for tomorrow...more Halloween is coming!
Thanks for stopping by & have a great day!
~Wendy

Saturday, September 17, 2016

Cookie Cutter Halloween

Hello & Happy Saturday!

Yesterday I whipped up a few Hershey Nugget Packs for Halloween with the Cookie Cutter Halloween stamp set. Take a look....


Love making these! 

Cookie Cutter Halloween Nugget Packs:

Stamps: Cookie Cutter Halloween, Spooky Fun (Sentiment)
Ink: Basic Black Archival, Pumpkin Pie
Cardstock: Pumpkin Pie, Whisper White, Halloween Night Specialty Paper
Accessories: Cookie Cutter Builder Punch, Banner Punch (flag end), 2 X 8 Cello Bags, Halloween Night Enamel Dots, Stapler, 2 Sided Tape

Another fun treat for some special Trick or Treaters!

***************************************

 My thoughts today....


That's all for for me!
Thanks for stopping by & have a great day!
~Wendy

Friday, September 16, 2016

Holiday Planner 2016

Hello & Happy Friday!

Our weather here has continued to be gorgeous even so much so that I had to shut my windows overnight because it got so cool out. Even still...I love this weather! 

Yesterday I spent about 6 hours at my stamp table just playing around with some things for Halloween & Christmas. Hard to believe the holiday season will be here in a few short weeks. I have been working hard to get things squared away so once Christmas gets closer I can spend more time doing some baking, watching holiday movies with my hubby & daughter and just enjoying that time of the year. Normally it is very crazy busy with working on last minute crafts for gifts and orders. 
So, since I have a drawer full of notebooks waiting to be recovered and decorated, I have spent some of my summer doing just that.
Here is a normal sized composition book recovered and decorated.


These notebooks usually sell like hotcakes at my craft shows. I also get orders for them throughout the year. I enjoy making these kind of things some days over cards because these can have alot of dimension to them over a handmade card. My poinsettia on this notebook is really popped up with lots of dimensionals and that big gold bead. I had a strip of Gold Glimmer paper in my stash that was cut just right to place under my flower. I'm not sure what it is about this poinsettia but I just love it! The gold metallic ribbon on the side of the notebook actually was wrapped around a pair of pj's that I got a few years ago for Christmas! I took my iron and ironed out the wrinkles so I could reuse it. I actually iron alot of my ribbons if I use it on something and then change it out. It gets the wrinkles out of it so I can reuse it for another project. Anyone else iron their wrinkled ribbons??


Holiday Planner Composition Notebook:

Stamps: Papertreyink, Reason for the Season
Ink: Real Red, Garden Green
Cardstock: Garden Green, Real Red, Very Vanilla, Gold Glimmer Paper, This Christmas Specialty DSP
Accessories: Festive Flower Builder Punch, Lg Oval & Scallop Oval Punches, Gold Metallic Ribbon, Gold Bead, Dimensionals, Tombow Multipurpose Liquid Glue


Pretty, isn't it?
There will be more of these to come in the next several weeks so stay tuned!

***************************************************

My thoughts on this gorgeous Friday......


It's going to be a great day!

That's all for me today!
Thanks for stopping by & have a really terrific day!
~Wendy

Thursday, September 15, 2016

Gingerbread Cup Holder

Hello & Happy Thursday!

Yesterday I played a bit at my stamp table. As I mentioned, I have been cleaning out leftover craft show things and found a few of the small coffee cups and well, my mind went off thinking of what I could do with them. With new papers & stamps in the house, this is what I came up with and I think your going to like it!


If you remember I made these back in the spring for the Spring/Easter craft show and everyone of them sold! I love making these! Here is the link for a tutorial on how to make them.


Gingerbread Coffee Cup Holder:

Stamps: Cookie Cutter Christmas, Candy Cane Christmas
Ink: Early Espresso, Real Red
Cardstock: Real Red, Early Espresso, Whisper White, Red Glimmer Paper, Candy Cane Lane DSP
Accessories: Cookie Cutter Builder Punch, Wide Oval Punch, Circle & Scallop Circle Punches, Real Red Stitched Ribbon, Dimensionals, Tombow Multipurpose Liquid Glue

Hope you like this!
For anyone who knows me knows I am nuts over Gingerbreadmen!
 I may not part with this come craft show season!  LOL

*****************************************************

My thoughts for today......


Yippeeee skippeeeee!

That's all I have for today!
Thanks for stopping by & have a great day!
~Wendy

Wednesday, September 14, 2016

Spooky Fun Candy Treats

Hello & Happy Wednesday!

I had a chance to sit yesterday and craft a bit. 
I'm starting to prepare Halloween treats for my customers & friends. I recently picked up some candy treats at the store so I used my new goodies for these.


 I wanted something clean & simple and not too scary. I used the Spooky Fun Bundle for my adorable little pumpkins and some Pumpkin Pie Glimmer Paper for a pop of sparkle. The design of this candy treat bag comes from Patty Bennett and here is the link to check it out. My DSP is the Halloween Night Specialty Paper which by the way is awesome! I love every single sheet in this pack!

Spooky Fun Candy Treats:

Stamps: Spooky Fun
Ink: Pumpkin Pie, Basic Black Archival
Cardstock: Pumpkin Pie, Whisper White, Pumpkin Pie Glimmer Paper, Halloweenn Night Specialty Paper
Accessories: Halloween Scenes Edgelits, Black Rhinestones, Halloween Night Baker's Twine, Stapler, Cello Bags, Circle & Scallop Circle Punches, Dimensionals, Tombow Multipurpose Liquid Glue

I hope you liked! 
There will be more Halloween treats to come!


************************************

My thoughts for today.....


Yep, it's only Wednesday.....sigh!

That's all I have for today!
Thanks for stopping by & have a great day!
~Wendy

Tuesday, September 13, 2016

Peace, Love & Joy

Hello & Happy Tuesday!

I have been taking time to clear out all the leftover craft show stuff that I had boxed up in my storage room. Some things I kept but most of it went to the trash. It's time to let go of it. In between doing that I have had a few Christmas projects laying on my stamp table that just needed to be finished up so yesterday I got them done. This is one of those projects.


I used Peace This Christmas for the sentiment and an Impression Obsession Pine Bough die for my Pines. I have been looking into buying that die and on my last trip to L&L Stamps, I happily found it! This is the first card I made using it and i'm thrilled to say that it cuts so nice! It also goes great with this paper from Stampin Up's This Christmas Specialty Paper. 


Peace, Joy & Love Card:

Stamps: Peace This Christmas
Ink: Cherry Cobbler
Cardstock: Garden Green, Cherry Cobbler, Very Vanilla, This Christmas Specialty DSP
Accessories: Impression Obsession Pine Bough Die, Circle & Scallop Circle Nestibilities, Gold Pearls, Gold Cord, Dimensionals, Glue Dots, Tombow Multipurpose Liquid Glue

I am so happy with this card! Hope you like too!

****************************************************

My thoughts for today.....


Thankfully we are not having Taco Tuesday's at the Aungst Pad tonight! 
Baked spaghetti is what is on the menu! 

Well, that's all I have for today!
I'm hoping now that all my chores are done that today will be a crafty day! I have a bunch of new goodies waiting on my stamp table to get inked up and made into yummy goodness! 
Let the fun begin!

Thanks for stopping by & have a terrific Tuesday, my friends!
~Wendy

Monday, September 12, 2016

Forever Begins Today...

Hello & Happy Monday!

Hope everyone had a great weekend!

Yesterday our weather went from hazy, hot & humid to crisp. clear blue skies with a wonderful breeze.....and i'm liking it! It is such a welcomed relief and maybe a sign that Fall just might be coming! It is so nice having the windows open to air out the house but most of all sleeping without the air conditioning on! My kind of weather!

Today I wanted to share a card that was made for my dear sweet customer whom has requested a special wedding card for her granddaughter that was getting married. She gave me the invitation to pull from the colors & flowers on it to create a special card. This past Saturday was the wedding and I wanted to share her card and unfortunately I did not get a photo of the invitation before I gave it back.


On the invitation it had some cream colored hydrangea's and it was in colors of Pear Pizzazz and almost a wine color that I tried to match up to a few of our purple colors and ended up going with Blackberry Bliss. I cut out a Very Vanilla doily from a retired SU die called Large Delicate Doilies. I cut the doily in half and placed under my pretty hydrangea panel. Since the invite was done in Very Vanilla I used some Very Vanilla Satin Ribbon from my stash for a pretty bow. The sentiment is from the Suite Sayings stamp set and one that my customer thought was just perfect!! 

Forever Begins Today Card:

Stamps: Suite Sayings, Because I Care
Ink: Blackberry Bliss, Pear Pizzazz & Blackberry Bliss SU Markers
Cardstock: Very Vanilla, Blackberry Bliss, Very Vanilla
Accessories: Circle Nestibilities, Large Delicate Doilies Die, Very Vanilla Satin Ribbon, Vanilla Pearls, Dimensionals, Tombow Multipurpose Liquid Glue

I was so pleased with the finished card and so was my customer!

***********************************

My thoughts today.....


Amen to that!

That's all for today!
Thanks for stopping by & have a great day!
~Wendy


Wednesday, September 7, 2016

You Party Animal

Hello & Happy Wednesday!

Today I made my way down to make some birthday cards since I have a bunch of September & October birthday's coming up.
I wasn't sure where i'd start or what stamps to use but I ended up pulling out my Party Animal stamp set out that is from Avery Elle. Super adorable set that has been in my collection for possibly 2 years and it finally saw ink today! Wahoo!


Not only did my Party Animal see ink but I broke out those Lil Inkers Stitched Rectangle Dies today! Double Wahoo! Plus I used the Stitched Ovals on my card as well. Triple Wahooo!

It certainly was a good afternoon at my stamp table...let's hope I can keep up the momentum! Haha!


Party Animal Card:

Stamps: Party Animal- Avery Elle
Ink: Melon Mambo, Crushed Curry, Basic Black Archival
Cardstock: Melon Mambo, Crushed Curry, Whisper White, It's My Party DSP
Accessories: Lil Inkers Stitched Rectangles & Oval Dies, Crushed Curry Taffeta Ribbon, Rhinestone, Tombow Multipurpose Liquid Glue

****************************************************
My thoughts for today......


Haha! 
Thankfully I don't have that turned on on my phone.
 I truthfully probably wouldn't know how to turn it on. My kids always have to help me! LOL

Yep, Welcome to the 50's Club!

That's all for today!
Off to make some more cards quick!

Thanks for popping in today & have a great day!
~Wendy

Tuesday, September 6, 2016

Joyful Nativity

Hello & Happy Tuesday!

Hope everyone had a fun Labor Day weekend!

The weather here was beautiful so we got out and did more biking (which by the way we made our way to the Maryland Line on Sunday!!) and we hiked on Monday on a new trail. I was pooped out and just needed some time to get myself back together today but once supper was over I headed down to my stamp table to make a card. I found a card on Pinterest that was made by Brian King and just felt the need to case it with a few of my own touches. Here is the link to his card.


I fussy cut the Christmas Banner since I do not have the Bunch of Banners Framelits.
I placed my Christmas Banner above the Joy while Brian had his off to the side of the Joy. I used some Gold Metallic Ribbon on mine and also added the small Star of Wonder Memory Box diecut cut from Gold Foil Paper. I love the star, don't you??

Joyful Nativity Card:

Stamps: Joyful Nativity, Time of Year (hostess)
Ink: Garden Green, Cherry Cobbler
Cardstock: Garden Green, Cherry Cobbler, Very Vanilla, This Christmas Specialty Paper, Gold Foil Paper
Accessories: Memory Box Star of Wonder Die, Gold Metallic Ribbon, Tombow Multipurpose Liquid Glue

Thank you, Brian, for your inspiration and beautiful card!

*************************************************

My thoughts today....


It sure does....

That's all I have for today!
Thanks for stopping by & have a wonderful day!
~Wendy

Saturday, September 3, 2016

My Birthday Adventures & More....

Hello & Happy Saturday/Sunday!

A very late update this evening as I wrap up my busy but fun day!
Today (Saturday) was my 50th birthday. My hubby & I went out for a 16 mile bike ride this afternoon! It was fun except I got a bit of sun/wind burn on my face from the hefty winds we had from Tropical Storm Hermine. I didn't have any sunscreen on as I figured we would only do our usual 6-8 mile ride but since the weather was gorgeous.....we went way farther than we ever have before. We were 3 miles from the Maryland line today! What an accomplishment! 
I have to say that riding south your definitely riding uphill which those last 3-4 miles were no easy feat! My knees are reminding me now how tough it was but coming back...smooth sailing!! 

Here are some pictures...


My hot rod taking a break heading south...


Pit stop in Glen Rock, PA. 
Busy little town along the Rail Trail. 
Lots of different style eating places that smelled SO good!


Mile Marker 4....what a killer! It doesn't look it but your going uphill.


Last Mile Marker on this trip took us to Railroad, PA. 
3 miles left to the Maryland Line which did not happen today but hopefully sometime this Fall.
I had a really nice birthday as my hubby & 2 kids spoiled me with nice gifts. Even my doggies (Gigi & Bailee) gave me lots of moochies! Those are the best! It was a wonderful day!

So enough about my birthday adventure!

I managed to get some time in to create before and after our bike ride.
Here is what I created today!


Now these are gorgeous in pink, don't ya think?

Pink Poinsettia Tags:

Stamps: Reason for the Season, Lots of Joy
Ink: Pink Pirouette, Garden Green, Basic Black
Cardstock: Pink Pirouette, Garden Green, Thick Whisper White
Accessories: Festive Flower Builder Punch, Two Tags BigZ Die, White Pearls, Thick White Twine, Tombow Multipurpose Liquid Glue

******************************

My thoughts for today.....


That is all for today!

Thanks for stopping by & enjoy this nice holiday weekend!
~Wendy

Friday, September 2, 2016

Night of Navy Poinsettia's Tags

Hello & Happy Friday!

The Labor Day weekend is here! 
It's the official end of summer and I can only hope that cooler days will be here soon!
The weather this weekend is looking to be nice but short lived as the heat will be back next week.
Anyone have any fun plans this holiday weekend?

So, yesterday I sat and played with my Reason for the Season stamp set and the Festive Flower Builder Punch. I had this idea to make Night of Navy poinsettia's.
Take a look...


Not sure how I feel about these but I wanted to try something different than the typical red poinsettia's. 
What do you think?


Night of Navy Poinsettia Tags:

Stamps: Reason for the Season, Woodgrain Background Stamp
Ink: Night of Navy, Crumb Cake, Garden Green
Cardstock: Night of Navy, Crumb Cake, Garden Green
Accessories: Festive Flower Builder Punch, Two Tags BigZ Die, Jute, Rhinestones, Silver Metallic Glitter Washi Tape, Tombow Multipurpose Liquid Glue

*******************************************************

My thoughts for today.....


That's all for today!
Thanks for stopping by & have a great day!
~Wendy

Thursday, September 1, 2016

Holiday Planner 2016

Hello & Happy Thursday!

Up and at it early this morning so I could place my Stampin Up order for the new Holiday Mini Catalog that went live today! I will be set now for the next couple of months with lots of stamps, embellishments, paper and cardstocks!  As I said to my hubby, Happy Birthday to me! 

Anyways, we had some really good rain here all night and i'm sure my grass is loving it! I know I am! It's suppose to turn cooler and the humidity is to leave us for a few days. I'm all for it just so we can get out & ride our bikes or hike some trails. My hubby said to me yesterday.....Our bikes called and asked where we've been....LOL That sure made me laugh! 

Anyways, just a quick project to share today. I think you will like it!

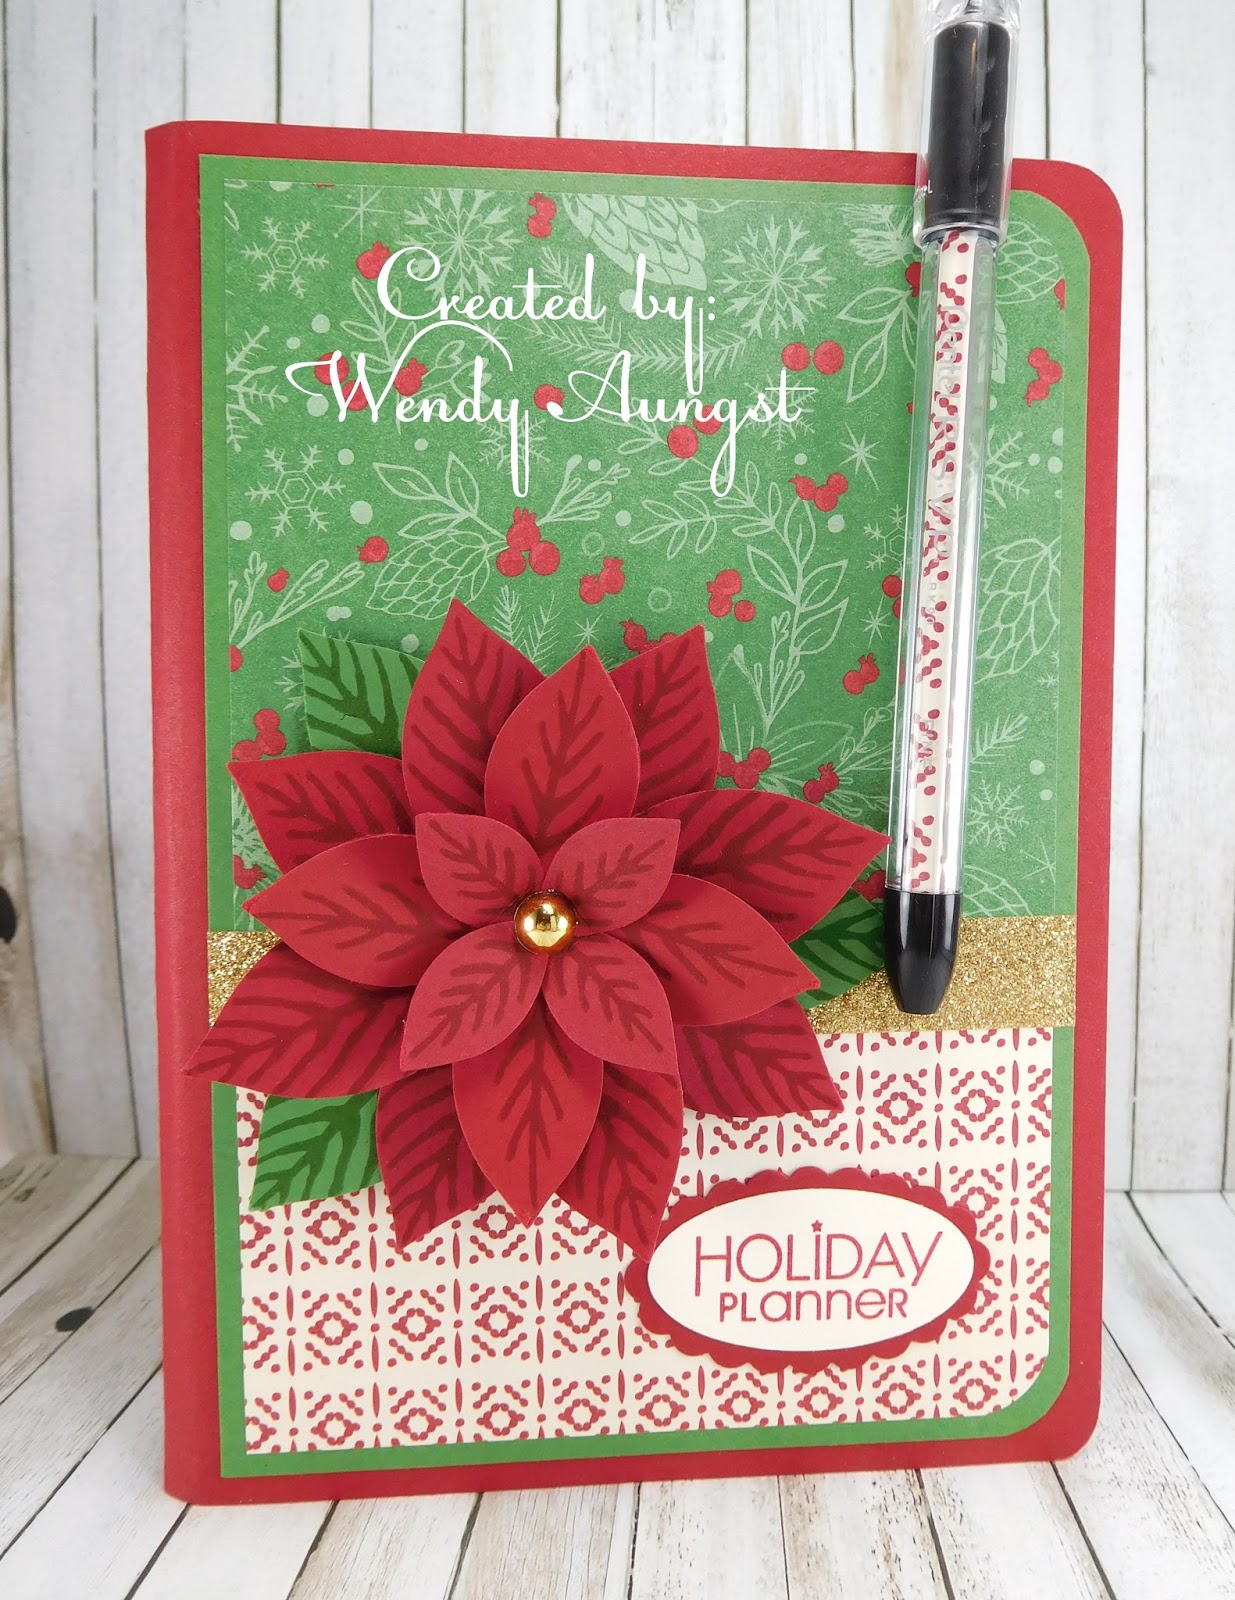
Earlier this year I found these adorable smaller sized composition books at Michael's and snagged up maybe 5 of them. I recovered them with cardstock & fancied them up for the holidays with DSP and things to catch your eye. I added an RSVP pen with matching DSP inside of it to complete my set. I used that pretty poinsettia flower from the Reason for the Season stamp set with coordinating Festive Flower Builder Punch. I have been using this set like crazy the last few weeks! One of my favorites!!


I'm not really sure if I can actually part with this. Guess we will see!

Holiday Planner Notebook:

Stamps: Reason for the Season, Sentiment from Papertreyink
Ink: Cherry Cobbler, Garden Green
Cardstock: Cherry Cobbler, Garden Green, Very Vanilla, This Christmas Specialty DSP (LOVE THIS!!!)
Accessories: Festive Flower Builder Punch, Oval & Scallop Oval Punches, Corner Rounder, Gold Metallic Glitter Washi Tape, Gold Bead, RSVP Pen, Dimensionals, Tombow Multipurpose Liquid Glue

Hope you like! 
Isn't that flower so pretty?! Love, love, love!

*****************************************************************

My thoughts today....


I don't know about you but I am SO ready for my part of the world to start looking like this picture! It will make bike riding on the trail so nice! It almost looks like the trail! One can dream, right?! 

Happy September, my friends!

That's all for today!
Time to grab another cup of coffee and get the day started!
Thanks for stopping by & have a wonderful day!
~Wendy